Saturday, November 3, 2012

Christmas Card

This awesome card is a Loy original.  In fact we just made them today.  I'm exited to show it to you. 
All of the items we used are from Stampin' Up.


Item List:
Versa Mark Ink Pad
Black Embossing Powder
Christmas Stamp Set
Dimensionals

Paper List:
8 1/2 x 5 1/2 Whisper White
3 1/2 x 3 1/2 Gold Glitter
3 x 3 Whisper White
4 x 5 1/4 Cherry Cobber

The stamp set we used is discontinued, but this will work with multiple stamp sets.

1. Cut all paper.
2. Stamp the Sediment on the bottom of the Cherry Cobbler Paper.


3. Stamp the 3x3 Whisper White Paper.


4. Add Embossing Powder to the inked papers.
5. Using heat set the embossing powder.
6. Using Dimensionals place the 3x3 on top of the 3 1/2 x 3 1/2 paper.
7. Using Dimensionals place the 3 1/2 x 3 1/2 on top of the 4 x 5  1/4 paper.


8. Stamp Sediment on the inside of card.


Wednesday, October 31, 2012

Buttermik Rolls

I  found this recipe on the back of a Red Star Yeast Packet.  I love it!  These rolls are fluffy, savory, and just amazing.  Get your bread machine ready!


Buttermilk Rolls
1 c Buttermilk
1/4 c Water
1/4 Vegetable Oil
2 T Sugar
1 t Salt
1/2 t Baking Soda
3 c Flour
1 pkg Yeast

1. Bring all ingredients to room temperature.
2. Place ingredients in the Bread Machine in the order given making sure that the Yeast is the top layer.
3. Select Dough Cycle.  Do not use a delay timer, the Buttermilk could go bad.
4. When cycle is complete remove dough and press evenly into greased 9-inch square pan.


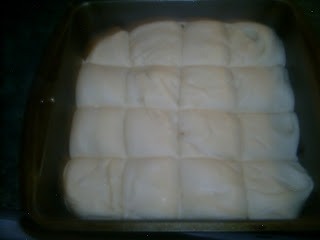
5. With a knife cut dough into 12 rolls cutting almost to the bottom of pan.


6.   Sprinkle top of dough lightly with flour. 


7. Cover; let rise in warm place until indentation remains after touching (about 20 to 30 minutes)
8. Bake in preheated 400°F oven for 15 to 20 minutes until golden brow. 
9. Remove from pan.
10. Break apart into rolls; serve warm.


Elizabeth's Way~
I always use cold Buttermilk, letting it warm up just seems wrong.
Instead of 12 rolls I only make 9.  They make the best sandwich rolls that way.
After the rolls have risen in the pan I dust off the flour and brush butter on the top.  It give the rolls a bakery gloss that just can't be beat.
Add a packet of Italian Dressing mix after the flour for a twist on this classic.  In fact you can add ranch or onion dip mix for 2 more different flavor combinations.  More often then not I add a dip mix.

Happy Baking!

Friday, October 26, 2012

Planting Garlic

It is mid October, in fact we just got our first snow in Colorado. Almost everything in the garden is dead, in spite of everything being dead there is work to be done. The most important chore to be done in the garden is the fact that the garlic needs to be planted. Planting the garlic is a simple chore, but one that should be done in the fall. Waiting for spring can result in small bulbs, or in no bulb development at all. Planing garlic is perfectly fine in the spring, but you chance not getting a great harvest.
Seed Garlic ready to have the paper skins removed
 Firsts things first.  You will most likely have to buy your seed garlic either from a company or from the grocery store.  If you don't care what kind of garlic you are planting you can just buy garlic from the store and plant it.  I've done it and it works.


Dug up and ready for step 3.
 Next dig up the spot you are going to plant you garlic in.  I currently have garlic in 2 different spots and I'm looking for a third spot.


This is Elephant Garlic I bought the parent plants to these bulbs at my local supermarket.  Here it is separated and ready to go in the ground. 


I had to switch spots while doing this tutorial.  The other spot was getting a little shady and cold.  So I moved to my second spot had my darling husband dig up a 2'x15' section of the garden.  I broke up all of the dirt clods and raked it smooth.  I then took the hoe and dug in about 1 inch and made 2 rows.  The rows are 1 foot apart.  Next plant the garlic.  The garlic needs to be pointy end up with the pointy end about 1 inch under the soil the cloves should be 6 inches apart.


The rows are better seen in the picture.  After I planted the garlic I added a top dressing of composted horse manure.  Garlic is a heavy feeder, meaning that it will suck everything it can out of the ground.  I make sure to add compost to the ground when I plant, as the garlic is growing and after I've harvested. 


The soil has been raked over the trenches, and the manure is hidden ready to feed the garlic.

After the garlic is planted it needs to have mulch added to the top.  3 to 4 inches will do, I think I have 6 inches of straw added to the top of my garlic.  Now you are ready to start your own garlic.

I happened to get my garlic from Sustainable Seed Company.  This will be my first year growing anything from them, but if you would like to check them out here is the website.   http://sustainableseedco.com/home.php

Thursday, October 18, 2012

Miracle Fudge


 I have yet to see a tutorial on Pintrest like this.  I love this recipe for fudge, it is simple, quick and tasty.  At my house we lick the spatula, mixer paddle and bowl.  Warning: This fudge is addicting!  You will want to make several different batches and your friends and family will beg for you to make them more after you give them some as a gift.
 
Milk Chocolate Fudge with Walnuts
Miracle Fudge
Ingredients:
1/4 c Butter
2 1/2 c Sugar
2/3 c Evaporated Milk
10-12 oz Chocolate Chips
6-7oz Marshmallow Cream
1 tsp Vanilla
1 c Walnuts (opt)

For this batch of fudge I used Cream de Menthe chips I'll go over variations later.

1. Line a 9x9 pan with aluminum foil and spray with cooking spray.
2. Pace Chocolate Chips, Vanilla, and Nuts(opt) in mixer bowl.
3. Put Butter and Evaporated Milk in pan.  Melt Butter.


4. Add sugar.  Make sure to stir constantly to avoid burning.  Bring to a rolling boil.


5. Add Marshmallow Cream, bring back to a rolling boil.  Boil 5 minutes.


This is the color that the marshmallow mix should look like.
If you get brown flecks, turn down the heat.
Do NOT scrape the sides and bottom.


This is what the bottom of the pan looks like, and why you don't scrape the pan ever!
And yes this will be left over after you dump out the marshmallow mix.
It looks like a waste, but will keep the fudge creamy.


6. Pour Marshmallow Mix over Chocolate Mix.  Stir just long enough to make sure everything is Incorporated and smooth.  I always stir the fudge with a spatula before I pour it into a pan.


7. Pour into prepared pan.  You can and I do suggest scraping the mixer bowl. 
8. Let sit a room temperature to cool.
9. Cut and enjoy!
 
 
Variations on a Theme
Replace the Chocolate Chips with different flavor chips such as:
Butterscotch
Peanut Butter
White Chocolate
Mint Chips
Cherry Chips
 
Kool-Aid Fudge
Use White Chips instead of Chocolate Chips and add Kool-Aid to the chips mix.
 
I hope you enjoy this recipe.  I know your friends and family will.  ~Elizabeth

Friday, October 12, 2012

Canning Butter

*Warning*  The USDA has stated that it is not "safe" to can butter, or any milk product for that matter.  I am choosing to ignore that warning.  I feel that if thousands of others have canned butter and have not become sick or died that I will try it.  I would like it if you don't comment on how this is unsafe.  Try this on your own risk, I have warned you.  ~Back to my regular post.

I have seen this several times on pintrest.  I had to try it.  I am working on our year supply, but with limited cash I thought this was the perfect way to store butter.  I have heard that in the Great Depression that they missed fats and butter most.  This would be a great way to add calories to a diet, and keep everyone from getting food boredom.

Canning Butter

Items List
Cookie Sheet
Wire Rack
6 Boxes of Butter
12 Canning Jars with Lids and Rings
Oven

1. Sterilize Jars, Lids and Rings
2. Preheat oven to 225°F
3. Line up the jars on the cookie sheet.  That way you don't have to move the jars one, by one.


4. Add one stick of Butter.  I've read blogs where they had to cut them to fit, but my sticks of butter fit perfectly.


5. Make sure to fit one stick to each jar.


5.  Put them in the oven for 15-20 minutes or longer the butter needs to be completely melted.


Here it is all melted.


6. Cut 9 stick of butter into 3 pieces.  You will cut 2 3 Tablespoon pieces and 1 2 Tablespoon piece.


7. Add 6 Tablespoons of butter to each jar. So either 2 3Tbsp pieces or 3 2 Tbsp pieces.


8. Wipe the rims of the jars, then add the lids and rings.  Tighten them figure tight,and put them back into the oven.  They need to be in the oven for 45 minutes. 


9.  Take them out of the oven and listen to them "ping".  Let them cool down for a while then start shaking. 


10.  Here they are after shaking them.  This way everything is mixed back together.  They will keep for 3 years so make sure to rotate your stock, and use up what you can.

I had 2 that didn't seal so I took off the ring and lid.  Cleaned the rim of the jar and put on a clean lid.  I then put them back in the oven for 45 more minutes.  I had success and all 12 jars sealed. 

Happy Canning~ Elizabeth

Thursday, October 11, 2012

Yarn Scarf

I love making scarfs!  Since it is October in Colorado it is time for scarfs in the morning.  This scarf is elegant, flirty and beautiful. I picked a purple to work with so that it is easy to see, but with a such a wide variety of colors you could have a scarf to match every outfit.


Pull out the yarn from the middle. 


Next pick up every other hole to cast on 6.


Next knit like regular skipping every other hole. 


I'm trying to show you to skip every other hole, but I think the knitting needle is shinning a little to much.


Here it is after I've knitted several rounds. 


Keep knitting!  You will eventually get to the end of the skein of yarn.  Finish off your project like a normal knitting project.  Congratulations you have a new beautiful scarf.   Don't forget, to check out our e-bay store if you don't have the time to make one and you need it now.  These make great gifts, my Grandma is getting one for Christmas.

Keep on Crafting. ~Elizabeth

Christmas Stockings

With the Christmas Season coming up we are trying to make a few new things for the store.  Loy makes a different version of the Christmas Stocking.  I made my pattern with a stocking that was already made.  This a great project to use up jeans with holes.  I made 6 stocking with one pair of pants.  I have not finished this project, but here is the beginning of this project.

First I made the pattern then cut it out.  I then cut out the stocking from the Jeans. 


Here is the back pocket cut out


Next cut out the back part of the stocking from the leg of the pants. *Make sure to flip the pattern.*
 
 
You will end up with two pieces looking like this. I then sewed them together right sides out so that they would fray.  I think they are to plain so as soon as I figure out how to give this a little holiday spin  I'll finish up this project.
Happy Crafting! ~ Elizabeth

Million Dollar Garden Pasta Salad

Thanks to The Pasta Shoppe I was able to get some Thank a Million pasta. If you have not had a chance to try their pasta I suggest you order some now. It is the most amazing pasta I have ever had. I thought I would pass along this recipe I used with one of their amazing pastas.

Million Dollar Garden Pasta Salad

1 lb Thanks a Million Pasta
1/4 cup peas
1/2 cup chopped tomatoes
1/2 lb Colby Jack cubed
1/4 cup onions chopped
1/4 cup green onion tops
1/2 cup shredded Parmesan cheese
1/2 cup Italian Dressing
Fresh basil(optional)

  Cook Pasta and peas per directions on package. While pasta is cooking chop and cube ingredients except Italian Dressing. Add veggies, cheese and dressing to a bowl. Drain and rinse pasta and peas. Add Pasta and peas to the veggie mix and stir. Garnish with fresh basil (optional).

*More dressing can be added for a moister salad. Meat can be added to make a meal out of this dish instead of using it as a side dish. My favorites are pieces of Smoked Sausage, or Shredded Chicken


Enjoy! ~ Elizabeth

Apricot Pineapple Jam

I hope this helps you in your quest for delicious homemade goods. ♥

Apricot Pineapple Jam~ Courtesy of Aunt Linda

4 cups mashed Apricots

1 cup Pineapple

1 Box of Pectin

Sugar, Butter, and Lemon Juice asked for in the Pectin instructions

Add fruit, pectin, butter, and lemon juice in to a stock pot. Bring to a rolling boil and add sugar.

Bring back to a rolling boil and boil typically for 1 minute. Ladle into sterilized canning jars and process for 10 minutes, adding time for altitude. I had to process mine for 25 (I'm at 6,100+ feet). Fetch jars our of the water bath canner and let sit for 24 hours.

Letting the jars sit for 24 hours has nothing to do with the jam its self, but the lids. Go ahead go get a lid, I'll wait. If you have the nice shinny side up flip it over. There should be the white bottom and a rubber ring. Letting the jars sit for 24 hours insures that the rubber ring, that was warm and sticky while your boiled it in the canner, sticks its self to the jar.

Saturday, October 6, 2012

Saturday Morning Muffins

I woke up this morning to the smell of fresh applesauce.  Mom and I spent 2 hours peeling, coring and chunking apples.  After a night in a roster oven they have been turned into applesauce.  The best part of fresh applesauce is fresh Muffins.  These muffins only have 2 ingredients and a joy to make.  Almost every kitchen keeps these ingredients in stock.

Applesauce Muffin
1 1/2 cups Applesauce
1 box Yellow or White Cake mix
Dash of Cinnamon (opt)
Dash of Cloves (opt)

Preheat oven to 350º F.
Line cupcake pan with with liners or grease pan.
Mix Applesauce, Cake mix and Spices together.
Fill cupcake pan.
Bake for 15-20 minutes.

Makes 1 dozen regular + 9 mini Muffins

Done! 

I always make mini muffins for the little guys around here.  They love them, partly because they can run and play while eating.  I like them to they are a perfect dessert with lunch.

Want to make different flavor?  Simply substitute any pureed fruit or veggie for the applesauce.  You may have to add up to another 1/2 cup of puree because of how dense the fruit is.  Same goes for the cake mix it can be substituted for chocolate, or spice.

Click here for the original recipe.

Tuesday, October 2, 2012

Breakfast Cake

I found this recipe on pintrest and it is amazing!  I've made this recipe 4 different ways.  Here is the original recipe from Alexandra's Kitchen.  Now here is my version.  I've made cherry, blackberry, and strawberry breakfast cakes.  With the Cherry Breakfast Cake I added about 1/2 tsp Almond Extract.  I'm sure this will work with an array of fruit.  Find a fruit in season and go crazy.  I like to use fresh ingredients as I'm sure we all do.  I have always made mine with fresh buttermilk.  I find that if you take the cream off of 1/2 gal of fresh raw milk it makes more then enough butter and buttermilk for this recipe.  Raise a few chickens for the fresh eggs and you can just imagine how delicious this can be!

Strawberry Breakfast Cake


Breakfast Cake
Serves 6-8
½ cup unsalted butter, room temperature
7/8 cup* + 1 tablespoon sugar**
1 egg, room temperature
1 tsp. vanilla
2 cups flour (set aside 1/4 cup of this to toss with the fruit)
2 tsp. baking powder
1 tsp. kosher salt
2 cups fresh fruit
½ cup buttermilk

* 7/8 cup = 3/4 cup + 2 tablespoons
** This 1 tablespoon is for sprinkling on top

1. Preheat the oven to 350ºF. Cream butter with 7/8 cup of the sugar until light and fluffy.
2. Add the egg and vanilla and beat until combined. Meanwhile, toss the cherries with ¼ cup of flour, then whisk together the remaining flour, baking powder and salt.
3. Add the flour mixture to the batter a little at a time, alternating with the buttermilk. Fold in the fruit.
4. Grease a 9-inch square baking pan (or something similar) with butter or coat with non-stick spray. Spread batter into pan. Sprinkle batter with remaining tablespoon of sugar. Bake for 35 minutes. Check with a toothpick to make sure it is done. If necessary, return pan to oven for a couple of more minutes. (Note: Baking for as long as 10 minutes more might be necessary.) Let cool at least 15 minutes before serving.

I always have to make 2 pans, we just go through it that fast.  I'm sure this would be a wonderful recipe to take to a new mom or someone recovering from surgery.  ~Elizabeth

Chocolate Sauce

Have you ever found a recipe that you just had to make?  Then have you lost that recipe?  I pinned a recipe a few months ago for Homemade Chocolate Sauce,  I went to make it today and the page was gone.  I was devastated.  I couldn't believe it was gone, on the brink of tears I started looking for it everywhere.  After some searching I found it on facebook.  Thank goodness I found it on a canning group.  Those ladies sure take care of me!  Well back to the Chocolate Sauce, instead of buying it with all sorts of chemicals I'm intent on making my own.  Here is the recipe.  I have yet to make it but have rave reviews. 

Chocolate Sauce
by Karen...recipe from sbcanning.com

1-1/2 cup water
3 cups sugar
1-1/2 cup cocoa
1 Tbl vanilla
1/4 tsp kosher salt
2 Tbl lite corn syrup

In a med size pot over med heat, bring water and sugar to a boil. Whisk in cocoa, vanilla, salt, corn syrup. Whisk until all of the solids have been dissolved. Reduce the sauce for another 15 minutes until slightly thickened. Fill jars to 1/4 inch head space. Process in water bath 20 min.
WARNING: make sure you do it in a big enough pot because as it is cooking down, it actually cooks up and really expands and bubbles and burns your hand if not careful.
1 batch makes about 4-1/2 pint jars. I made a double batch and got 6-1/2 to 7. I made it with both the dutch process (which the recipe calls for) as well as the regular cocoa. The dutch process gave me a bit more and it is a bit more dark chocolaty. The reg is a bit more milk chocolaty.


After looking at this I'm already looking at way to tweak this and make it my own.  Look for it in the future. =)  ~ Elizabeth

Monday, October 1, 2012

Meals for New Moms

I never know what kind of food to bring when someone has a baby.  Forget me being able to think when there is an illness/surgery or funeral.  I've been on a mission to find meals that I am able to can or to freeze for such occasions.  So far I have nothing in my stock pile.  I'll update this post when I find a few favorites and keep posting as I find them.  If you have any suggestions for recipes let me know.

I do know that there should be some rules to bringing meals.  Here are some that I have found to be true.
1) Call and see if they need a meal.  With new moms normally the new grandma comes to visit for a few days/weeks.  I would wait in tell all other adults have left before bringing a meal.
2)While on the phone ask if there are any allergies or special diets that need followed.  We have a list of things that have to be avoided here at my house, make sure the family you are bringing food to doesn't have any special diet needs.
3)Bring the food over in throw away dishes.  Save your butter tubs, or any other plastic tub to take food to others in.  That way you don't have to stress about getting your good pie pan back and they don't have to worry about what belongs to who.
4) Take enough to feed their family for two meals.  That way dinner is taken care of but also lunch the next day.
5) Make something easy for breakfast.  Muffins are amazing, coffee cake, etc.  Something grab and go.

Monday, September 24, 2012

Jean Skirt

We love these skirts!  They are fun to make and look great.  With the endless number of different materials and all of the different colors and washes of jeans these skirts are one of a kind. 


Materials needed
1 Pair Jean Pants
2 Yards of Material
Sewing Machine
Thread

 
I started by laying the jeans flat on my cutting mat.  I then cut off the jeans under the zipper, but above the middle of the crotch where the 4 seams come together.  


Here they are cut.  Make sure to stretch out the bottoms of the pants.  These pants measured 22 inches.  To find the measurement of the material you double the material and add at least 5 inches.  I cut the material for this skirt at 49 inches.


Sew your material right sides together so that you have a tube.  Set your stitch length for the longest stitch you can.  Next sew around the skirt 1/4 inch from the edge.  Then sew 1/4 inch from the first set of stitches.


Gather the material to match the width of the jeans.  Pin and sew together.


This is what the skirt will look like right side out.


I then hemmed the skirt.  How you hem it is up to you and what you like.


Add a belt of made of matching material.


Now you have a beautiful skirt that is rugged as well.


Like our projects, but don't have the time?  Then check out our E-bay Store!  We will be adding more soon.  Happy Crafting! ~Elizabeth